
This is a series of helpful hints I want to share with you that I’ve learned along the way in my art journey. For more How To’s click here.
If there’s one thing I love, it’s to learn how to do something myself that I usually pay a bunch of money for. Recently I bought a canvas that a company will print a picture on for you. And it got me thinking: what if could create a picture printed canvas on my own? With a little research, I found it’s not only doable, but it’s easy and cheaper to do it myself. Woohoo! Today I’m sharing the process with you, so you can do it too.
Let’s get this party started!
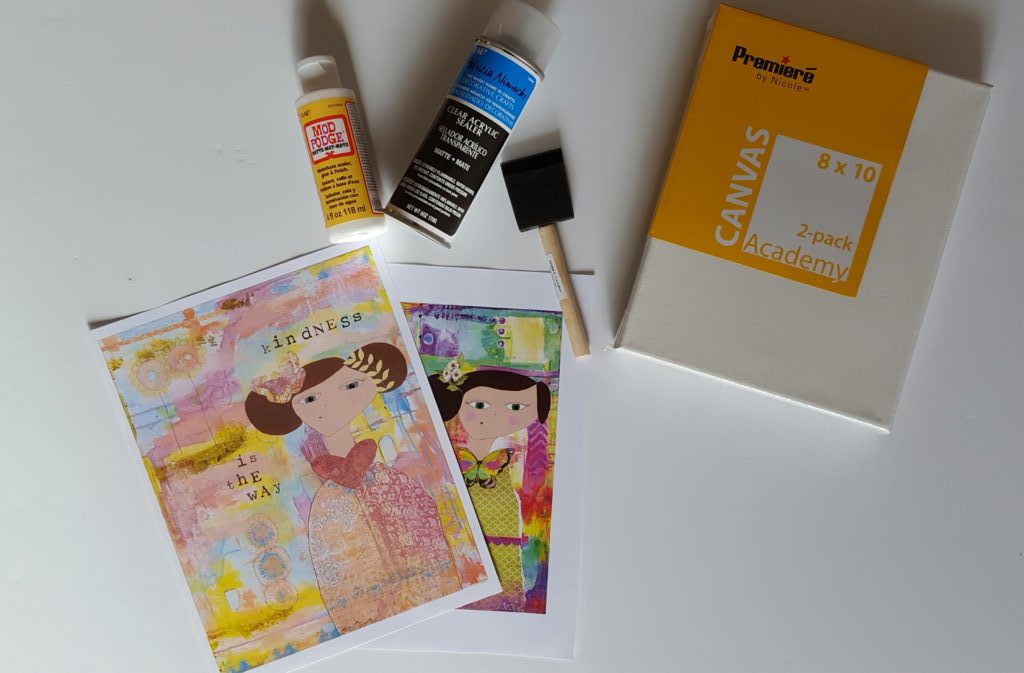
First, let’s talk supplies. Here are the things you’ll need for the project:
- Canvas.
Whatever size you want, but keep in mind you’ll need a print that’s somewhat the same size.
- Laser print of image you want to transfer, on photocopy paper.
(you can get this from Staples if you don’t have a laser printer) *It’s important to remember that if there is lettering on the image, you will need a mirror copy of it so the print is going the right way when it’s transferred. (I did it the wrong way originally myself!)
- Some kind of medium.
Liquitex has a great one that I use a lot but you can also use mod podge, especially if you’re on a strict budget. When you’re buying it, keep an eye on the finish; “matte” or “gloss” are the terms they will use. Consider these when you think about how you want your finished canvas to look in the end. Matte is cool but can dull the colors + gloss will give you a shine.
- Old credit card/used gift card for smoothing.
- Foam Brush
- Acrylic Sealer (Optional)
You can put a final coat on the image to extend the life of the colors and overall look.
The first thing you’ll do is smear a bunch of medium on your paper print. I used modpodge since it’s a product known for it’s ability to transfer images (and it’s cheaper which always helps). I just squirted a bunch on the paper and used the foam brush to move it around. You want to make sure that you coat the liquid evenly on the paper and apply it a little thicker than you’re comfortable with.


After I applied it, you can see that the image is barely visible through the layer of modpodge. That’s what you want. When everything is evenly coated, take the paper and lay it centered on your canvas. Then, as best you can, smooth out any air bubbles with your credit/gift card. A little warning here: be gentle. The paper is wet and will rip easily if you’re not careful so just glide that card around and get the paper as flat as you can against the canvas.
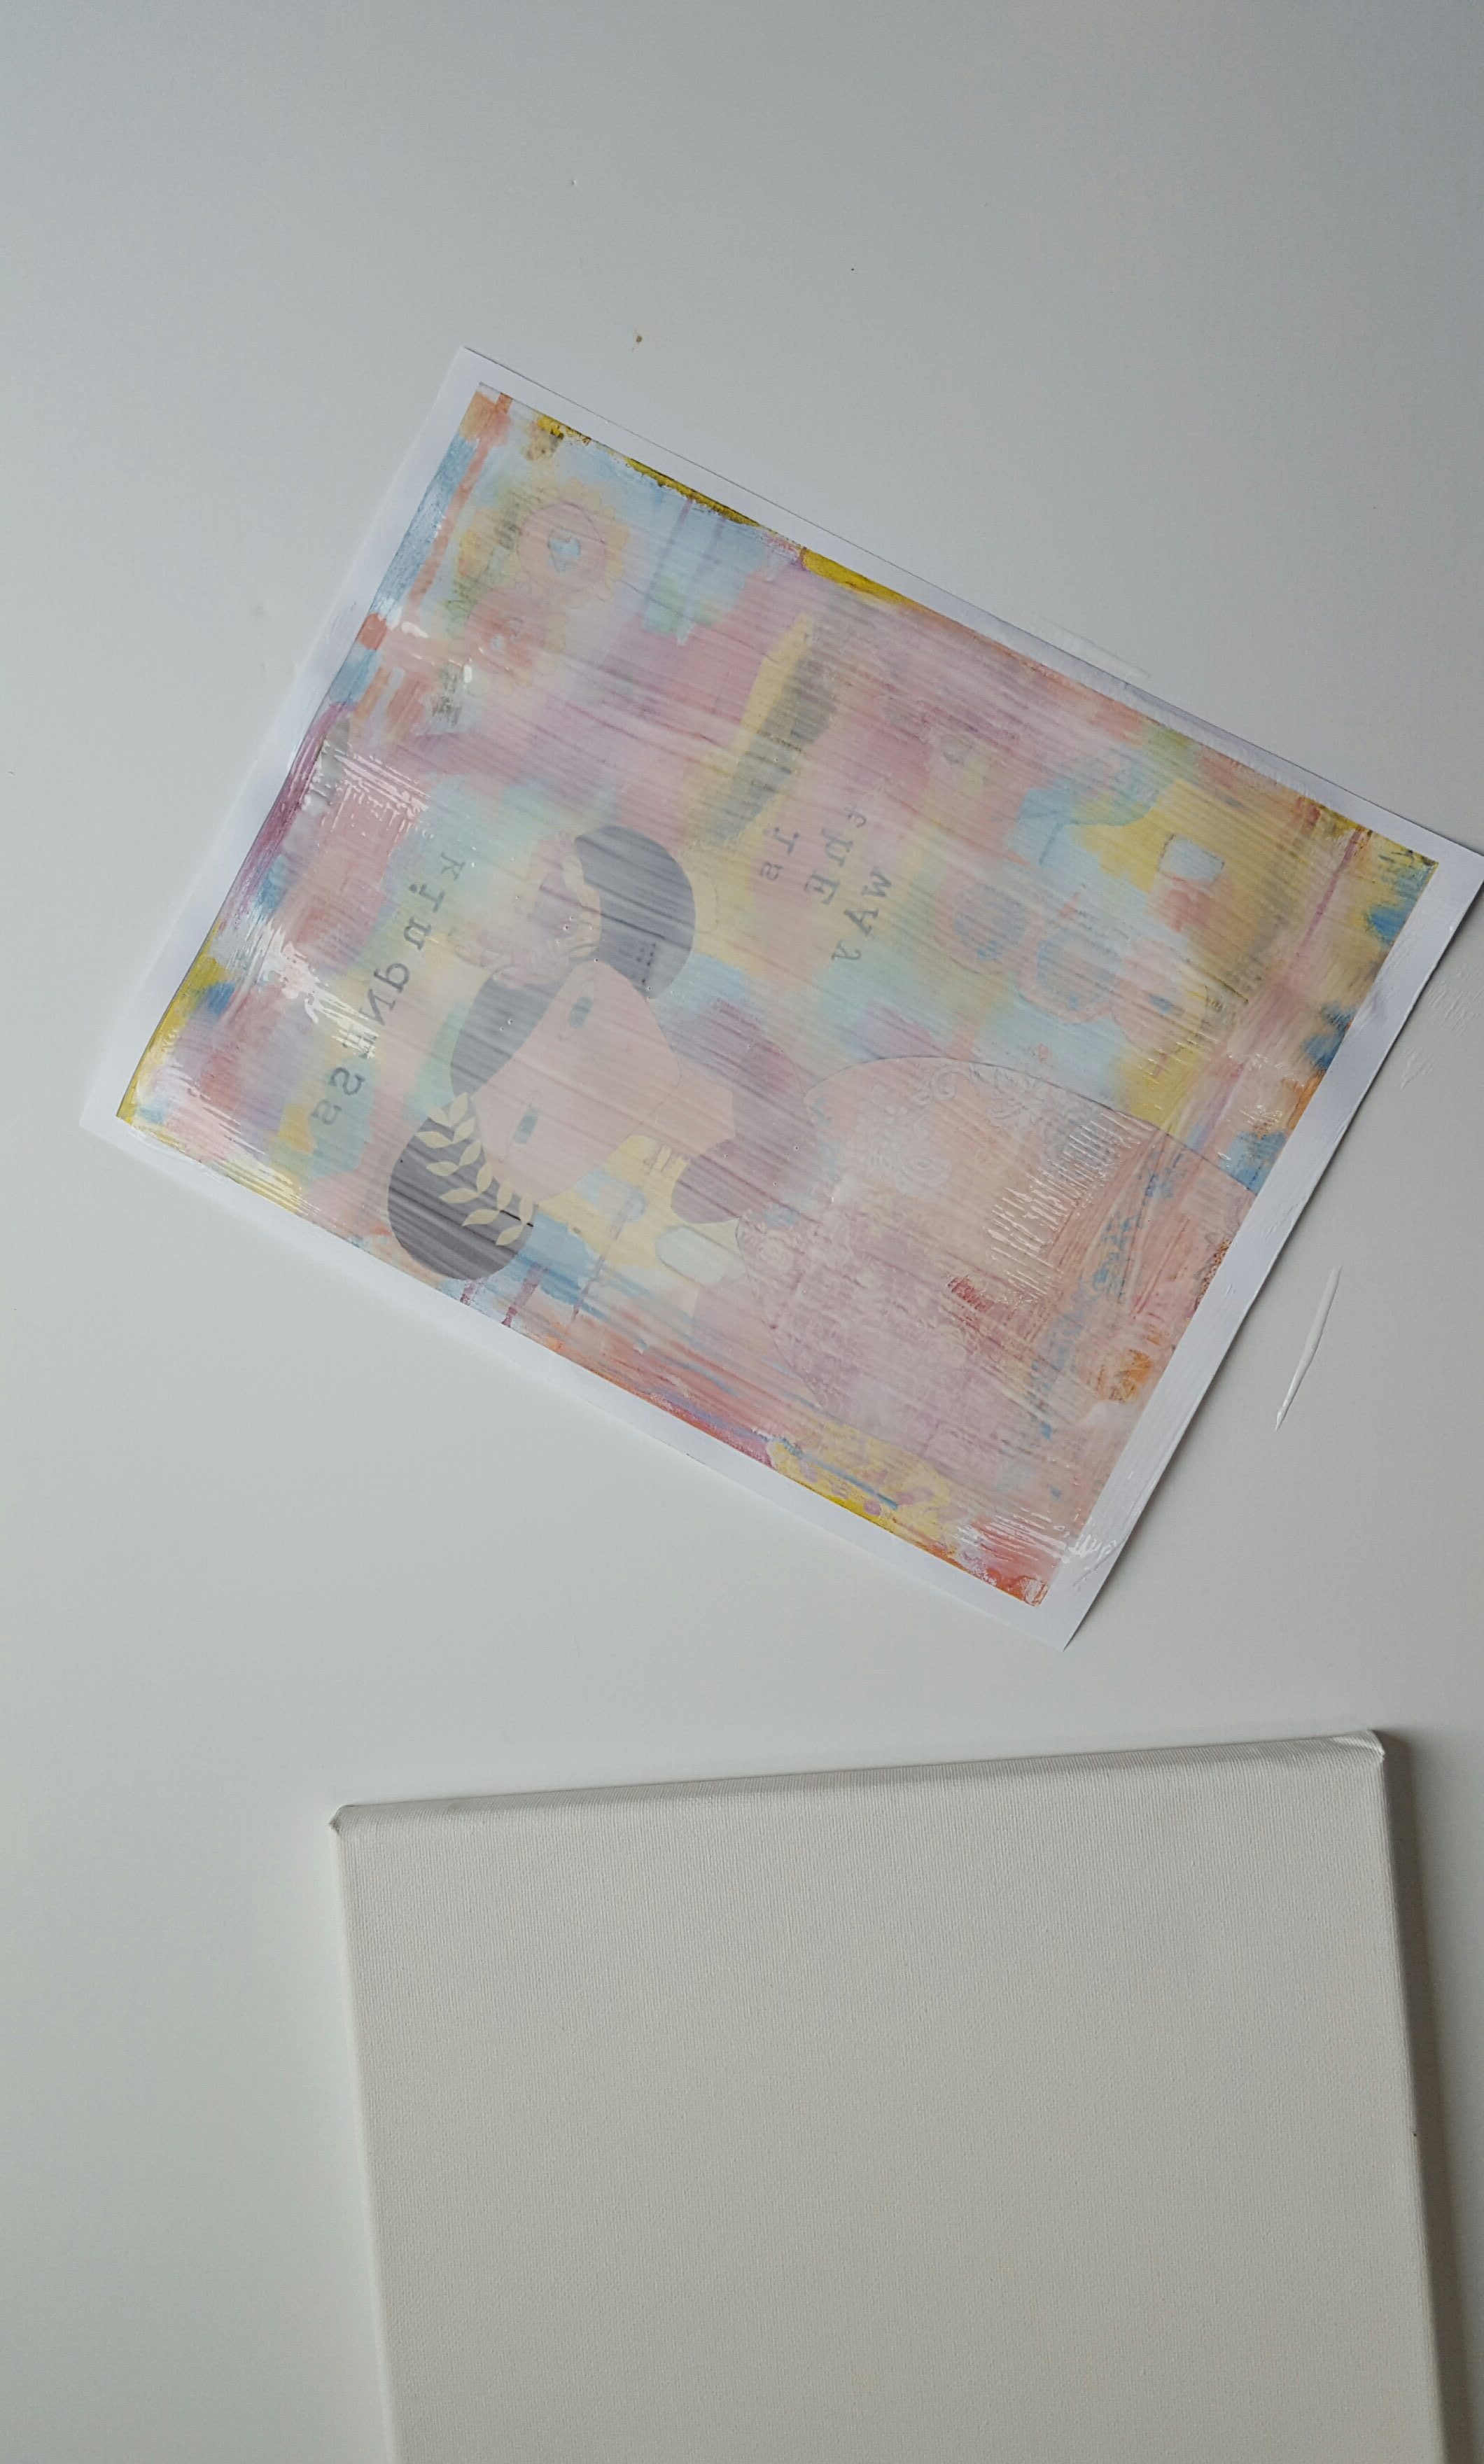
If you want to turn the canvas over so that the frame is facing up, it will apply extra pressure to the paper to make sure everything sticks. I even added some weights on top of the frame (I used candles) for good measure.
Next: you’re going to wait 24 hours. YES! You must wait or it won’t come out right. The medium has to completely dry so that you can separate the paper from the canvas without creating a gooey mess. Do it too soon and you’ll be covered in sticky paper. Yuck.
After you wait 24 hours, get your sponge really wet and gently coat the canvas with water. Pretty soon you’ll see the image appearing through the wet paper.
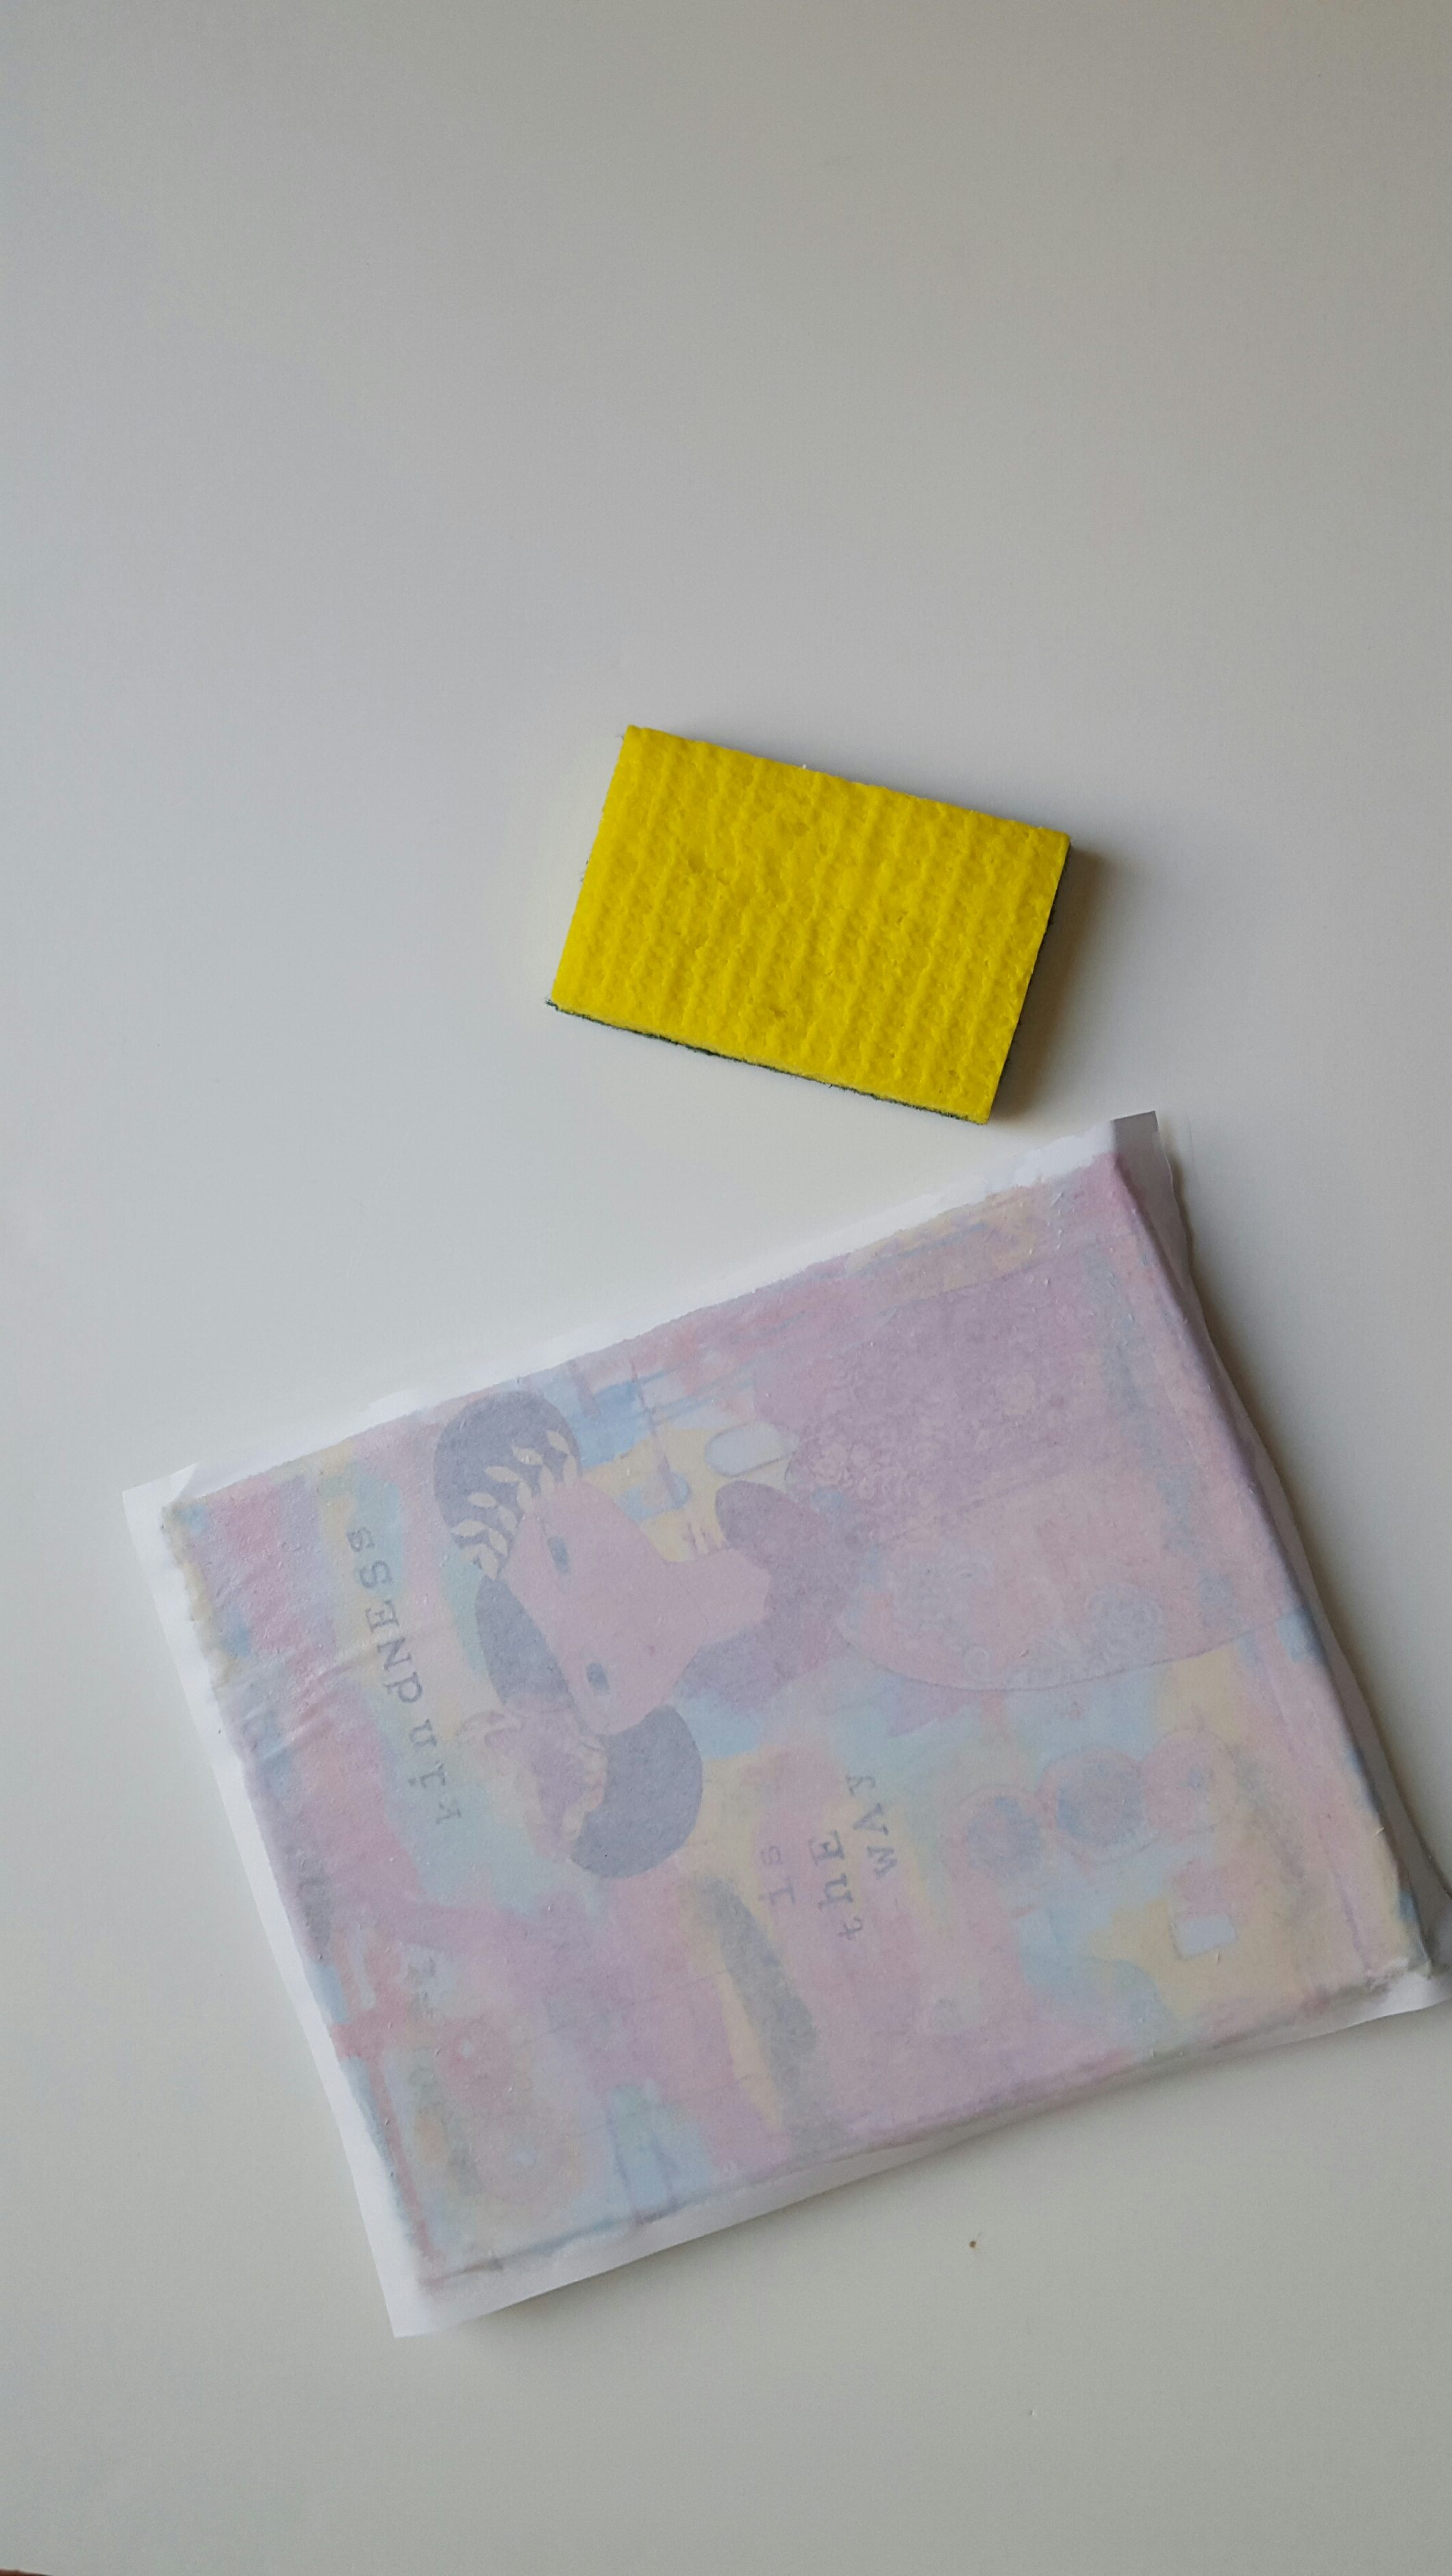
Start gently rubbing the paper off with the sponge. It gets a little messy, but that’s how you reveal the picture underneath. Keep wetting the paper and rubbing gently.
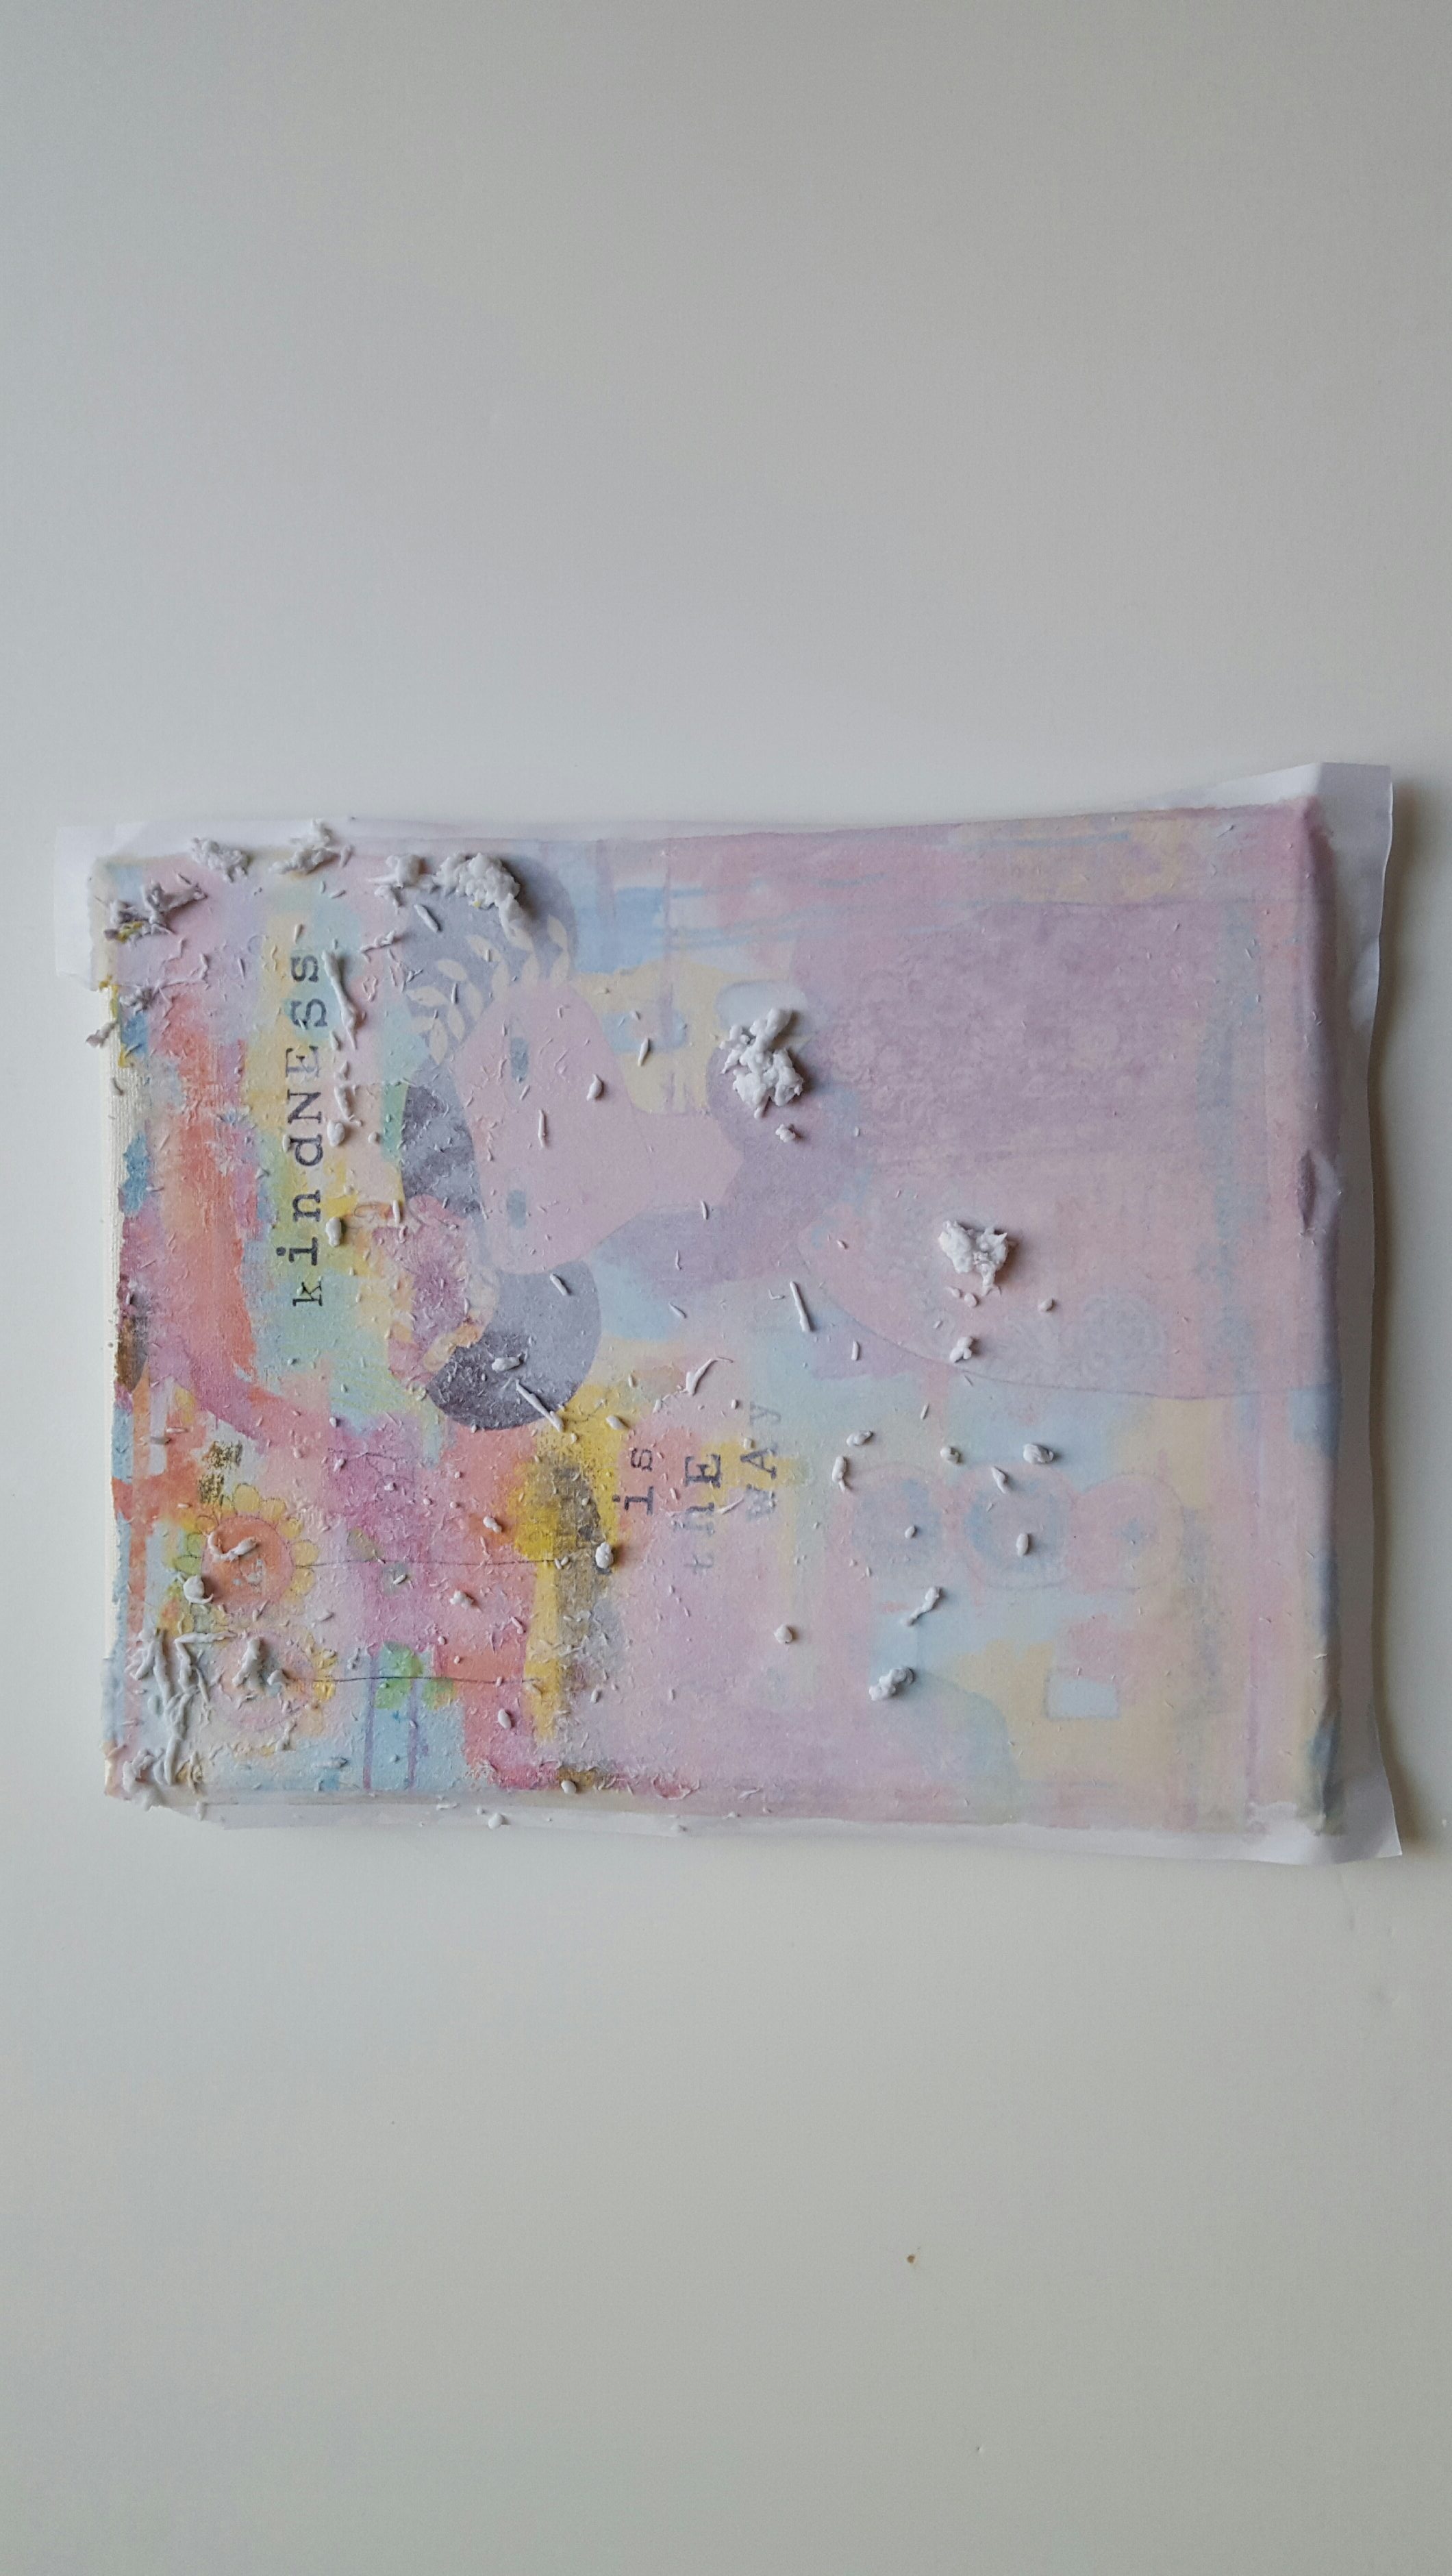
Eventually the paper will come off and you’ll have your image on the canvas. Magic!

So as you can see, I tried out 2 different styles with this project: one was to use an image that was flush with the sides of the canvas and the other looks like it has a natural border because the picture was smaller than the canvas. Which ever one you try is up to you and what kind of look you’re going for. If you try to do the flush edged style and it doesn’t reach the edge, you can always add a little paint to make it a mixed media one-of-a-kind piece! Just have fun with it and don’t get too crazy about making it perfect.
If the edges are a little ragged, you can either sand it with fine sand paper or just slap a little medium on it and smooth out those edges.
I do want to show you a mistake I made though, so you don’t do the same thing: I got a little zealous/impatient and used the scrubby part of the sponge to remove the paper. You can see where it pulled off part of the image from the canvas. Oopsie. But I can touch up those parts with a little paint too. And it gives it a little character, no?
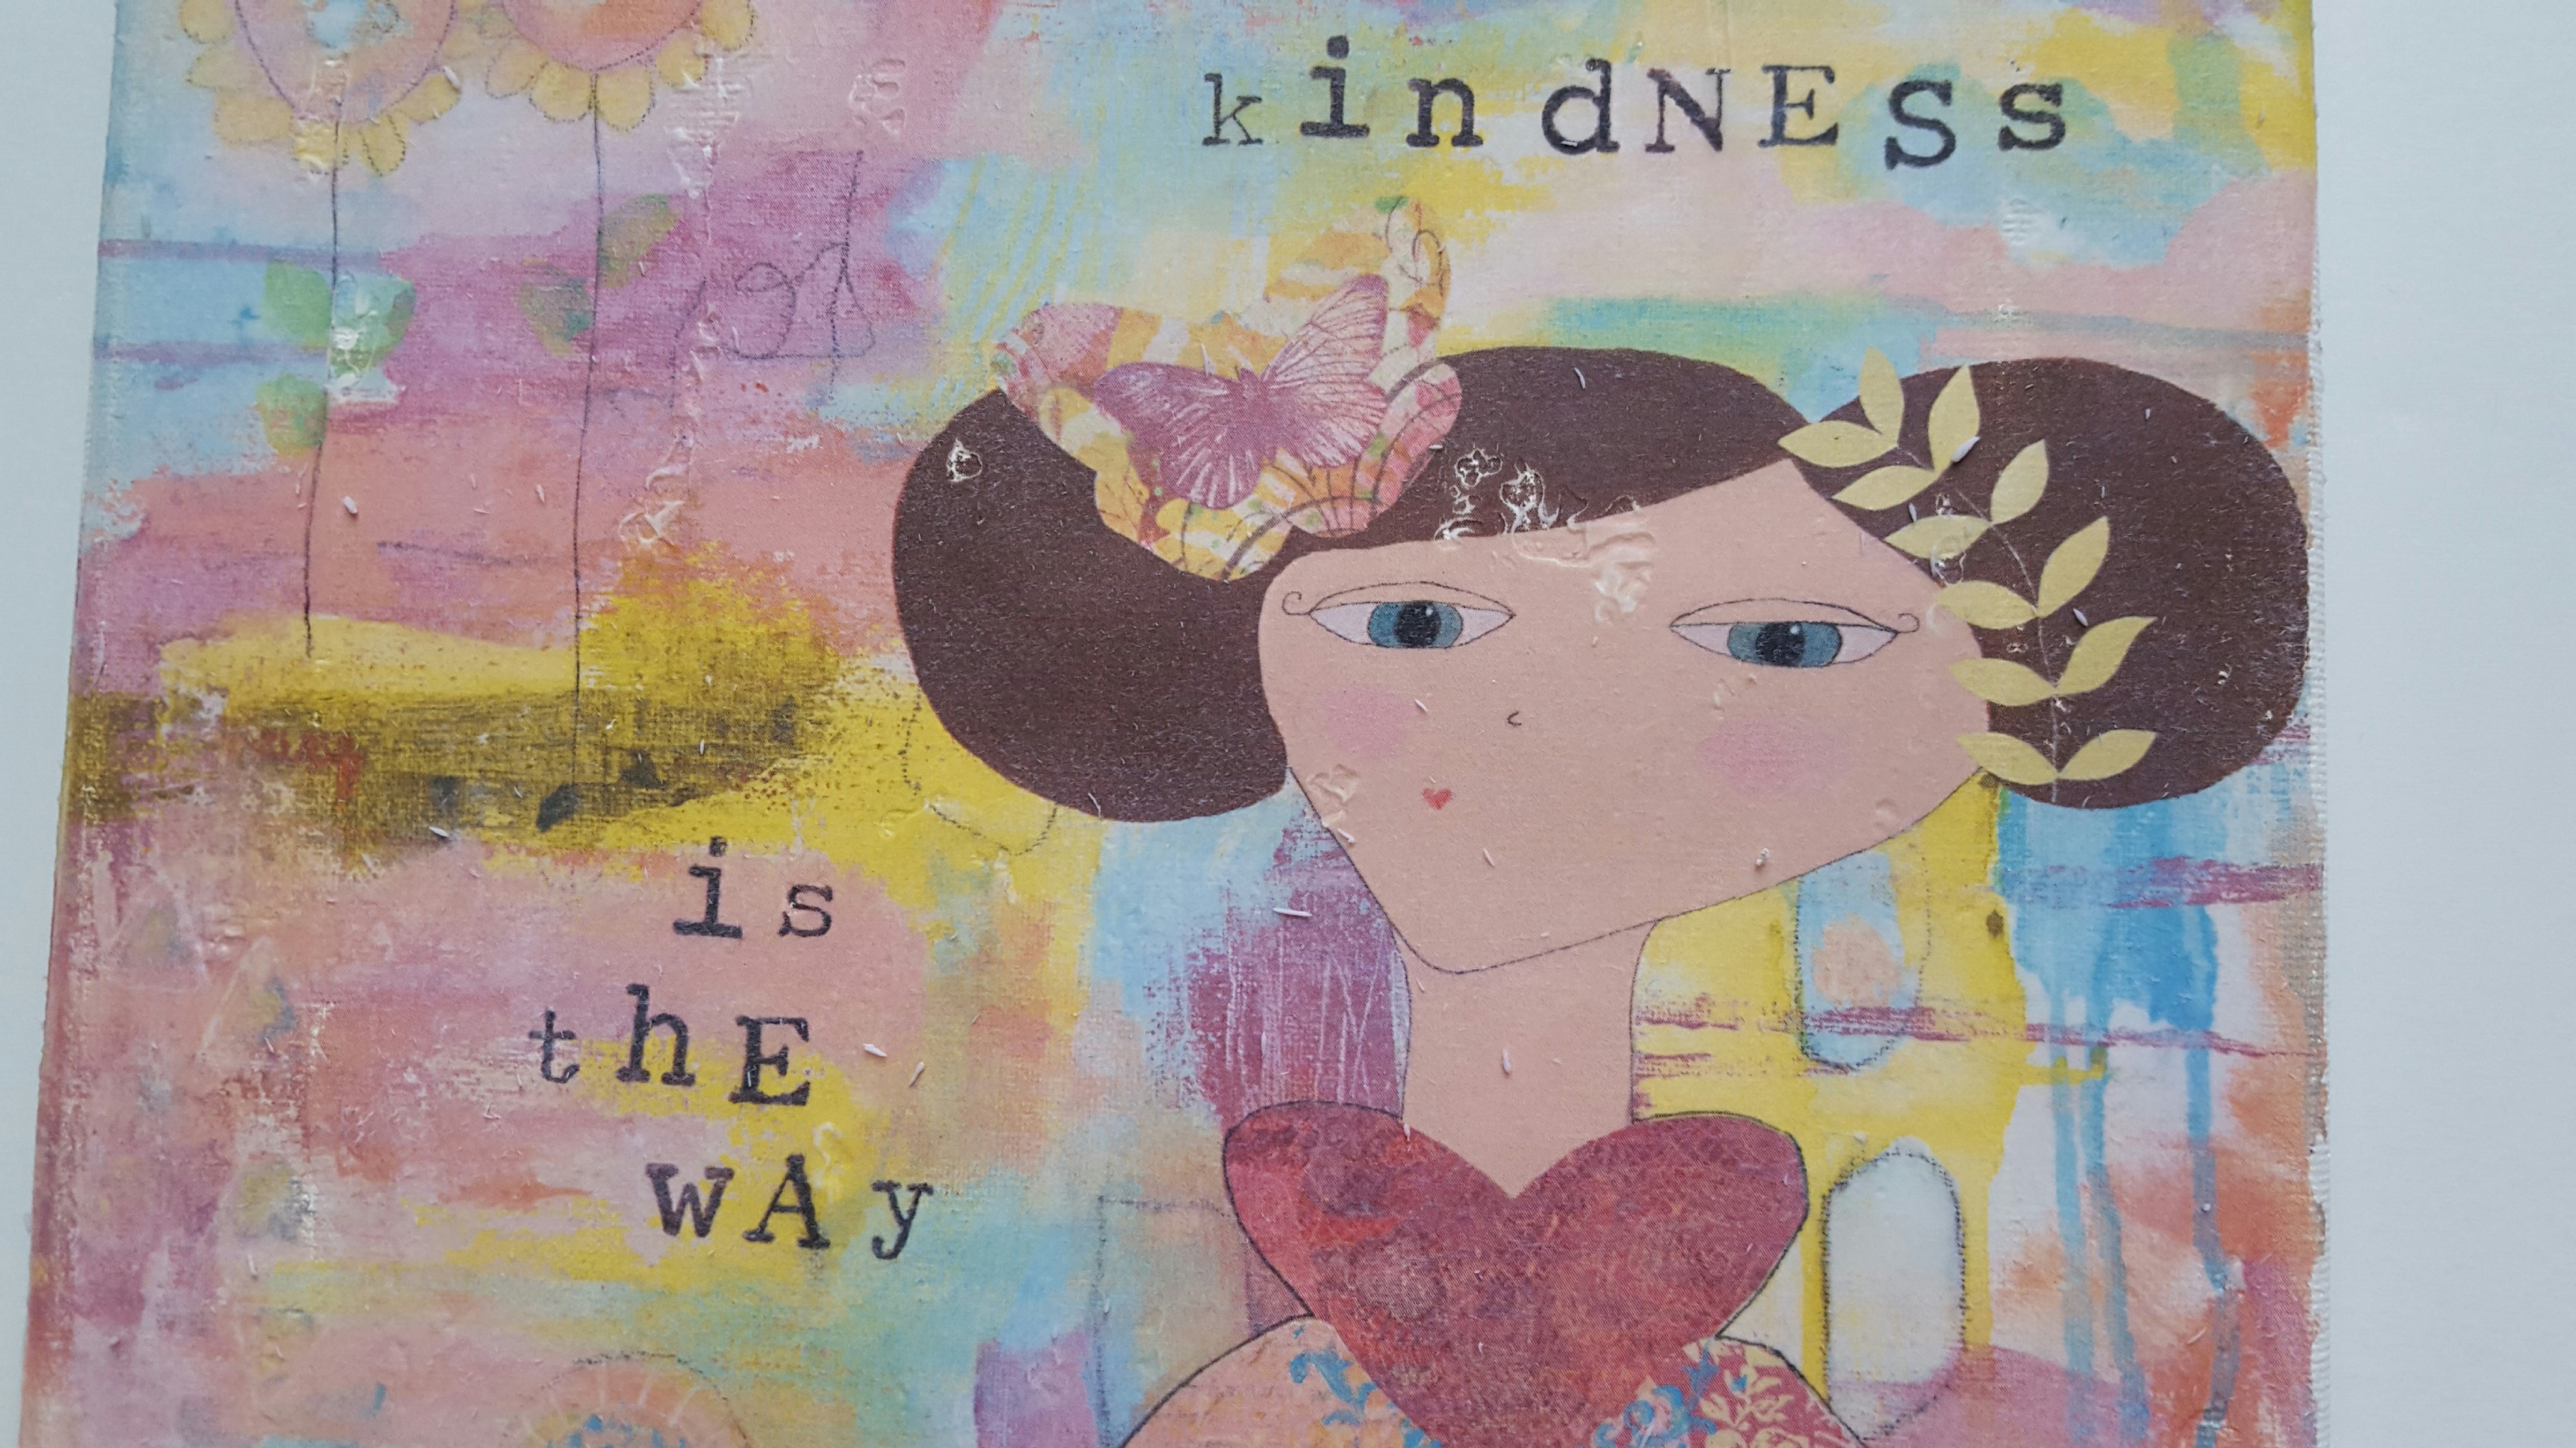
If you look closely on the left side of her dress, there’s a cut out that looks a little like a butterfly. That’s another part of my *ahem* enthusiastic paper removal, or maybe it was an air bubble. But you know what? I love how it looks. Some how the ink made it’s way to the canvas, and created a multi-textured look.

So there you have it, friend! How to transfer a photo to canvas for beginners. It was actually really easy and didn’t take a lot of time at all! And if you want to seal the image you can use a spray acrylic sealer OR add an isolation coat to it.
Hope you have fun trying!


